
Vertical: Pharmacy
PMS Eligible: N/A
Calendar in Practice Admin lets your pharmacy publish available appointments online in a familiar calendar view. This guide covers how to create, edit and remove your standard availability.
In this guide
- Access your Calendar
- Change your advanced publishing preferences
- Create a standard schedule
- Choose an appointment length
- Edit or delete a schedule
- Add availability quickly (ad hoc)
- Remove availability quickly (ad hoc)
- Edit or add Calendar rooms
- Contact Our Support Team
Access your Calendar
- Select Calendar in the side menu.
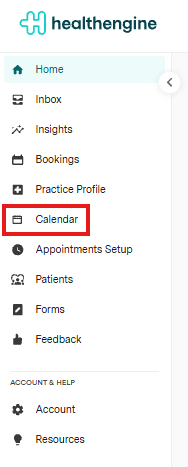
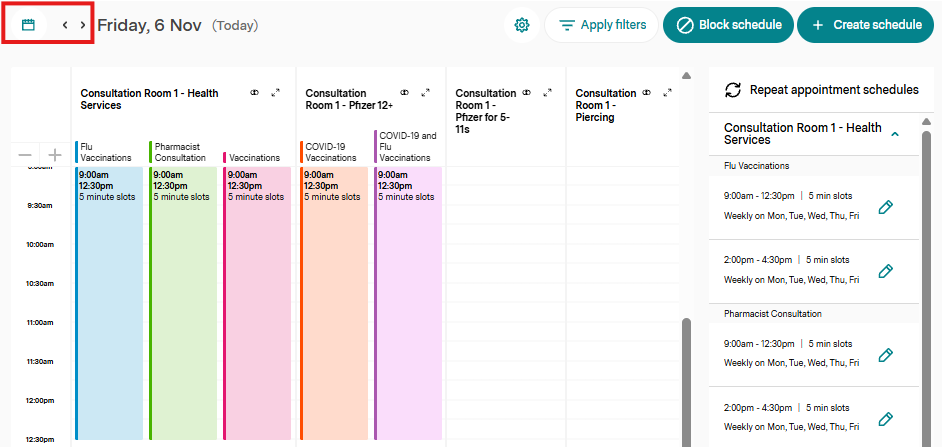
- Calendar opens on today's view. To change the day, use the < and > arrows, or select the calendar icon to the left of the arrows to pick a date.
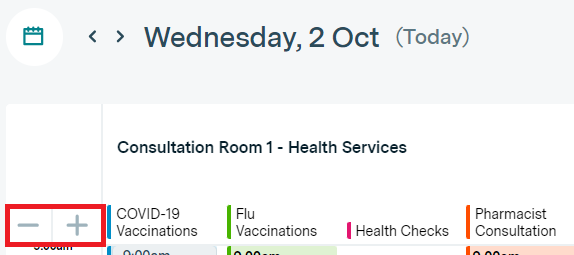
- To zoom the day view in or out, select + or - on the left.
Change your advanced publishing preferences
- Select the gear icon in the top right, next to Create Schedule.

- In the pop-up, choose how far in advance to show your available appointments online, and whether cancelled appointments are automatically republished.
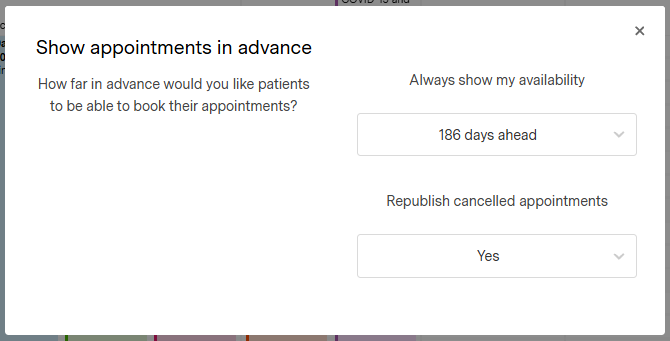
The maximum publishing period for pharmacy is 186 days.
Create a standard schedule
There are two schedule types:
- Standard Schedule: appointments published online for patients to book. Use this for your daily schedules.
- Exclusive Schedule: typically used for walk-ins or off-site campaigns. These can only be booked through a direct link or QR code generated from the Calendar page. See How to Create & Use Exclusive Schedules.
- Select Create Schedule in the top right above your Calendar.

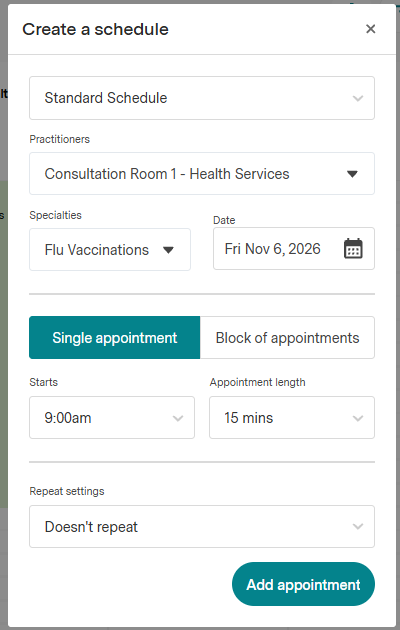
- Select Standard.
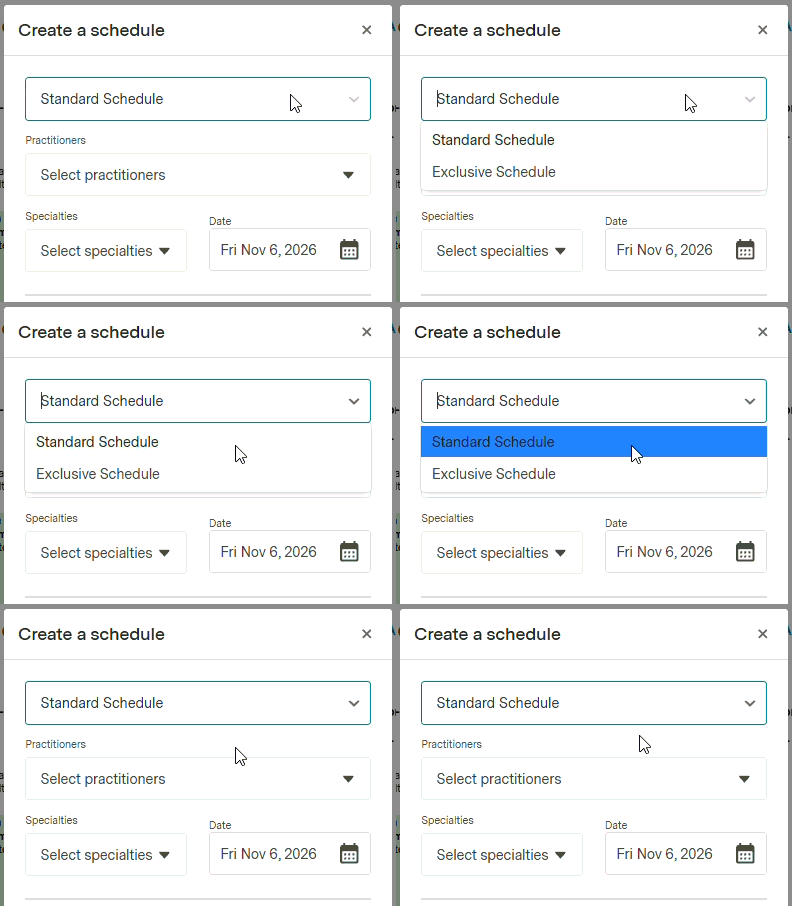
- From the drop-down below, select the consultation room to create appointments for.
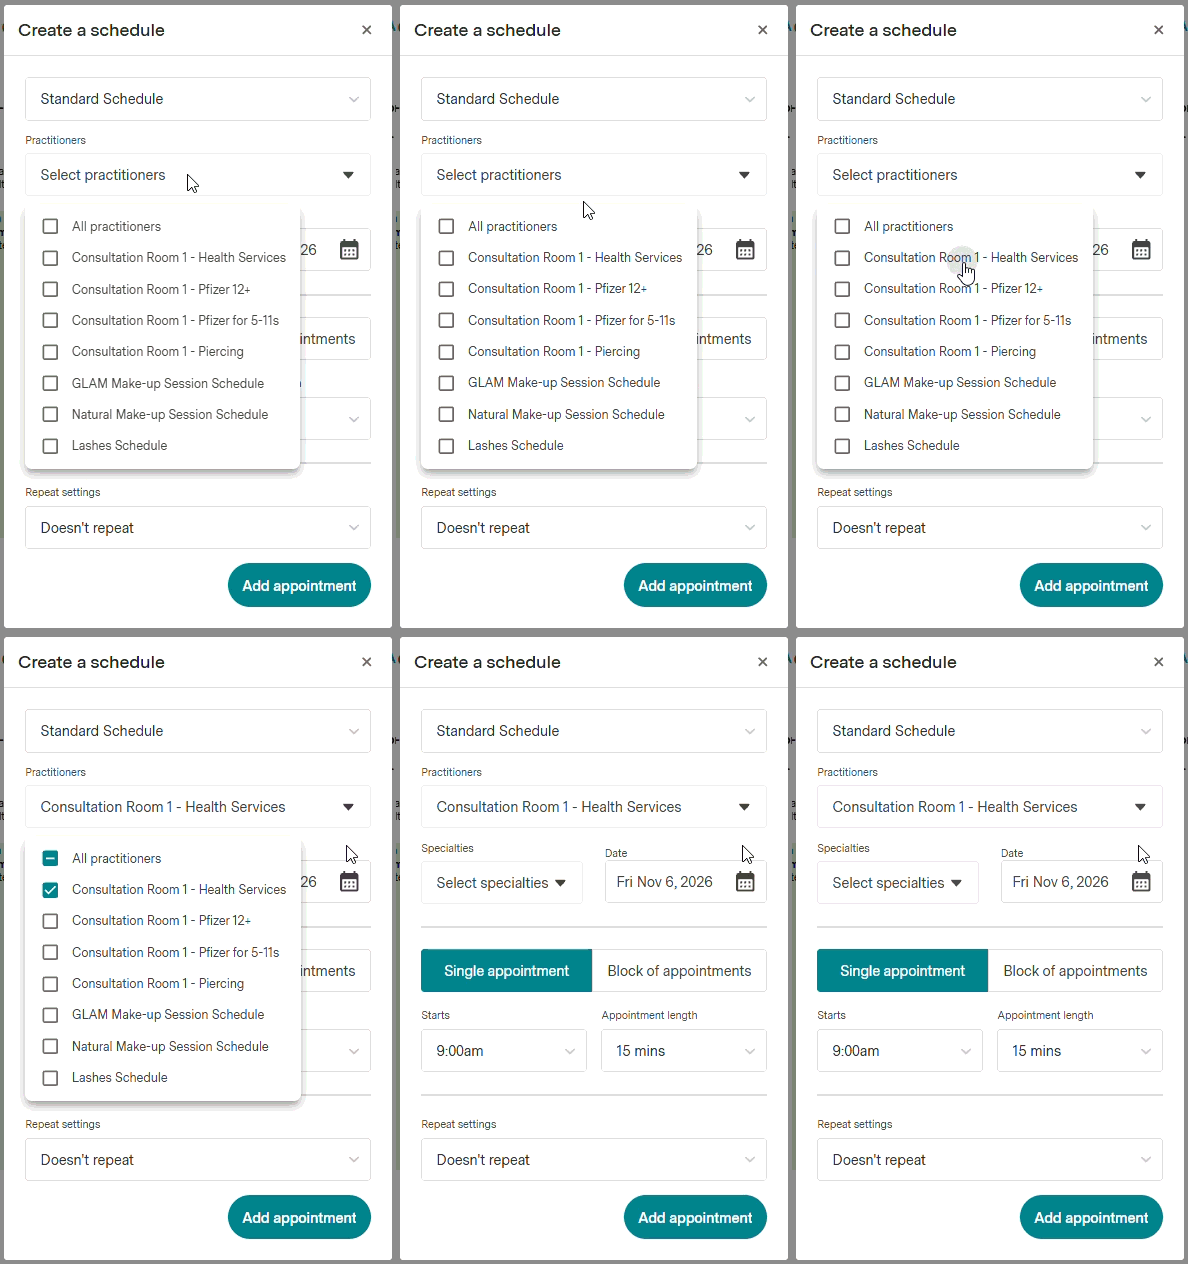
- Under Specialty, choose the service to publish appointments for.
- Services are listed alphabetically and default to the first one.
- Only specialties added to the chosen room are listed. If a specialty is missing, it is most likely assigned to a different room.
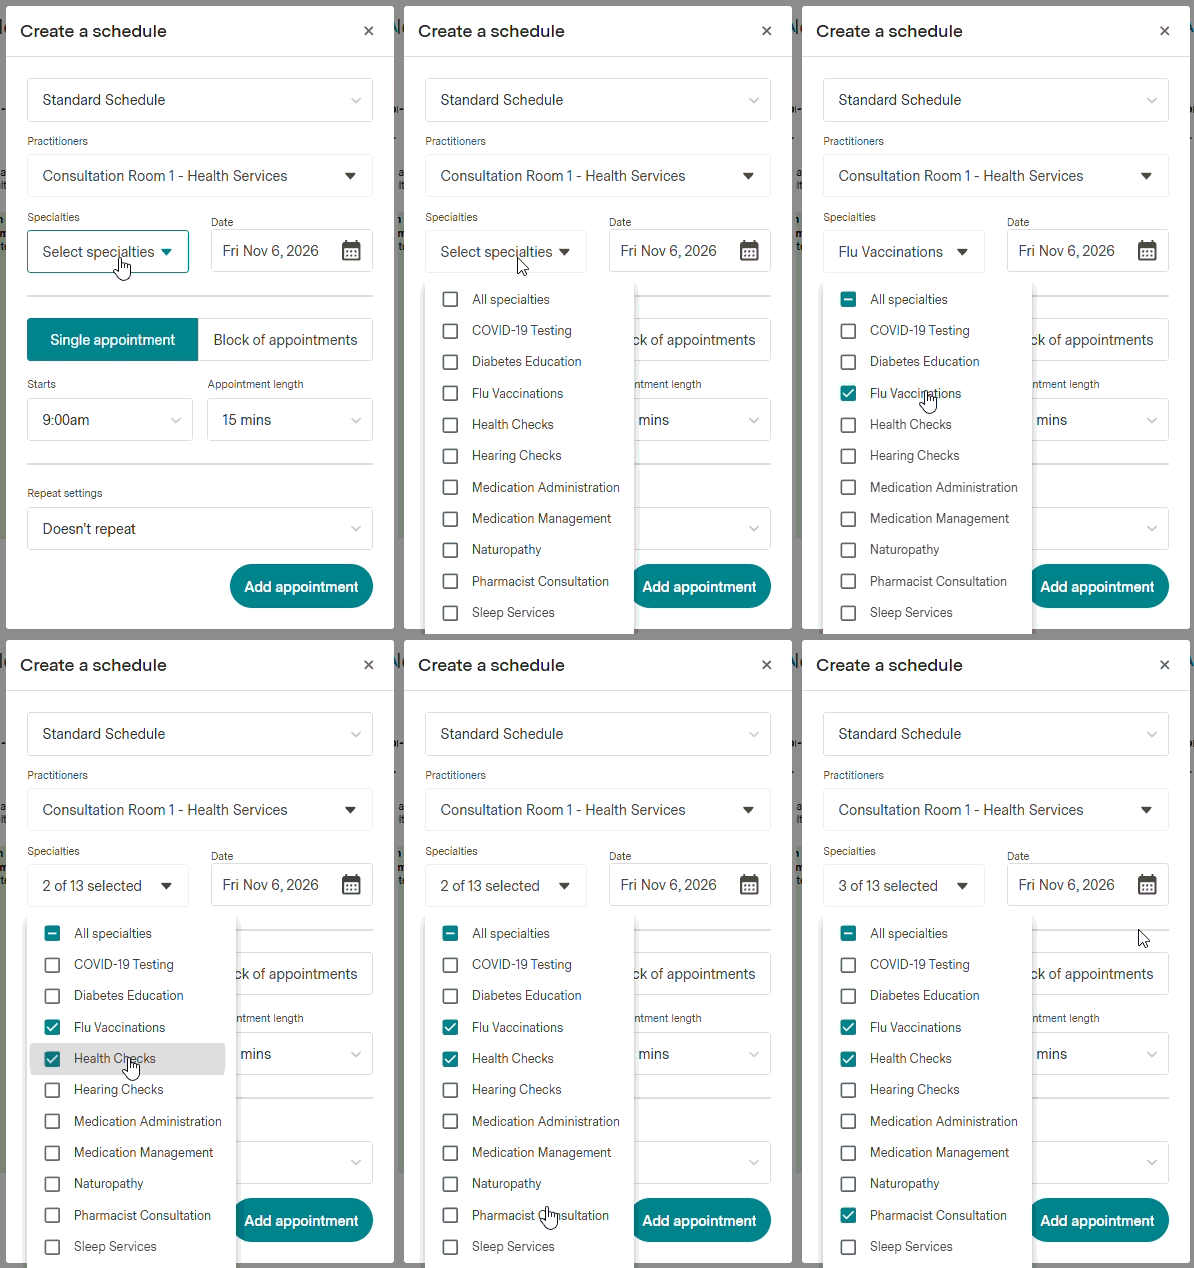
- Choose what to publish:
- Single appointment: one appointment. Select the start time and appointment length.
- Block of appointment: a block of appointments. Select the start and end time, and the appointment length (5 minutes minimum; see Choose an appointment length).
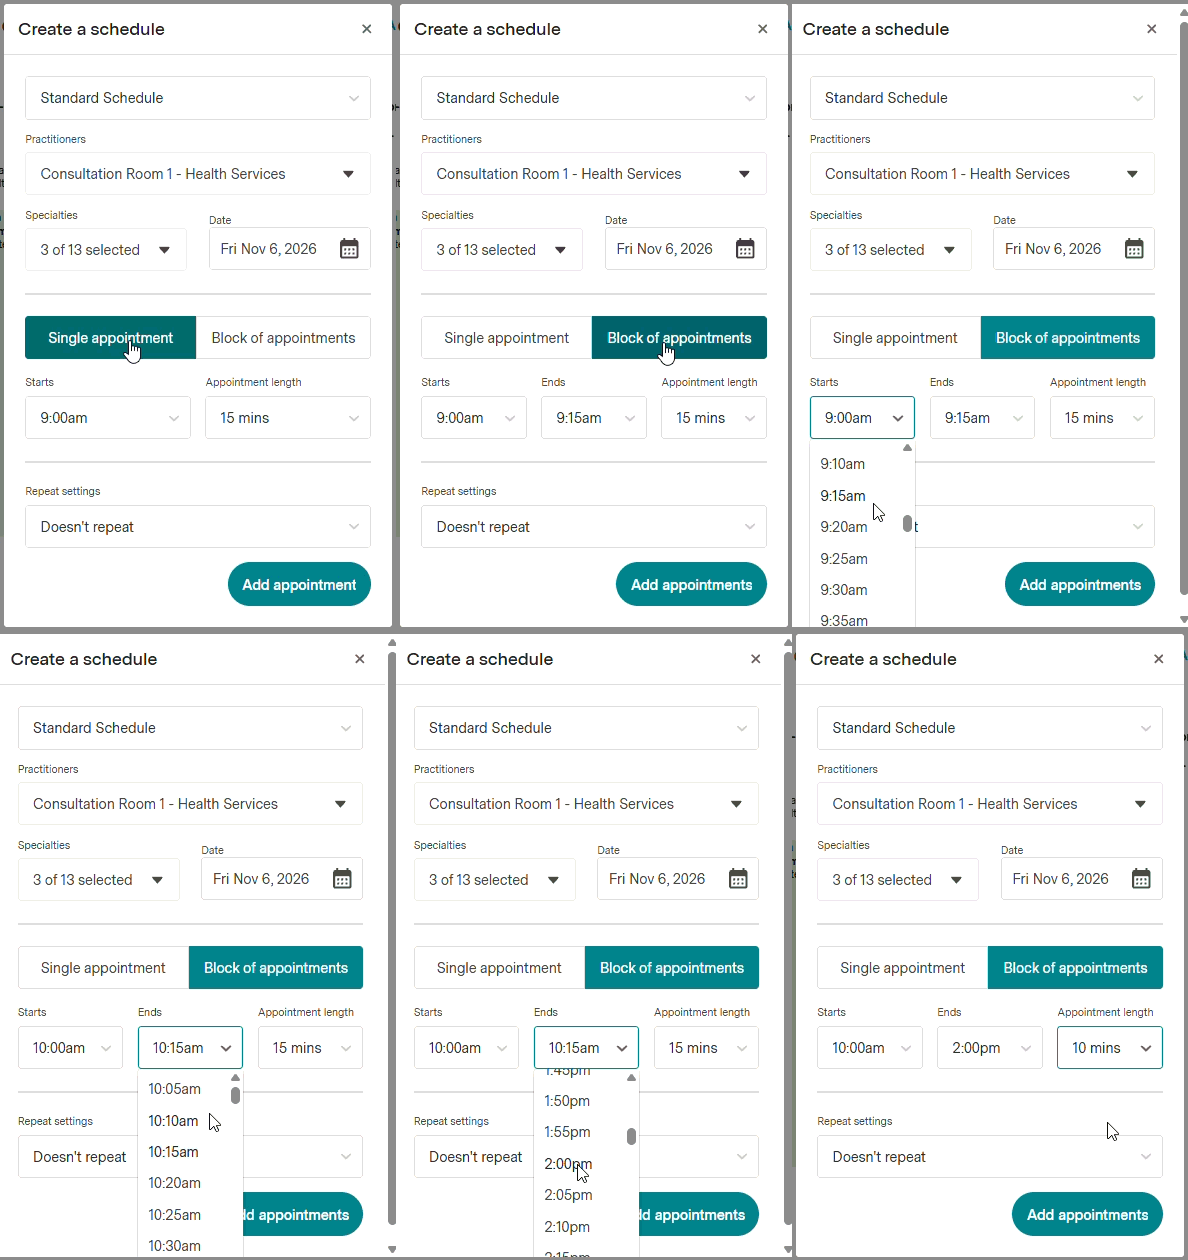
- Optionally, set Repeat settings to weekly, fortnightly or every weekday, and add an end date if the service is only offered for a set period.
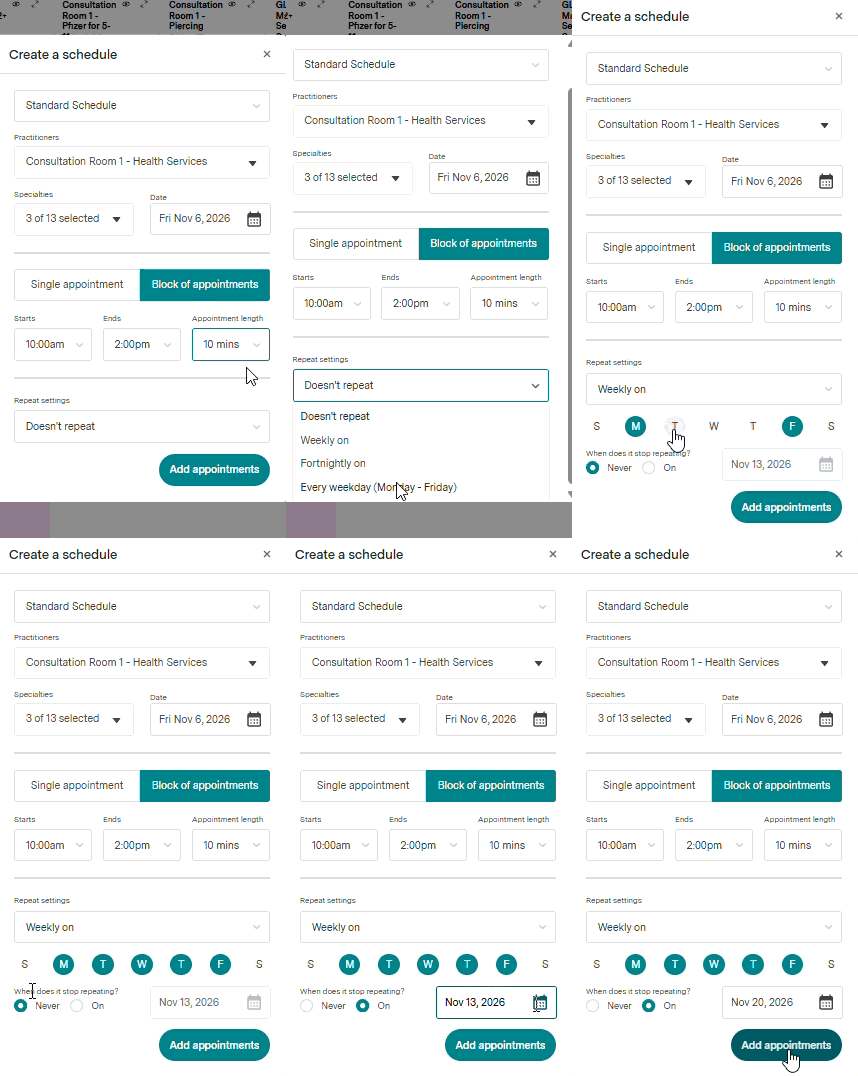
You can type a start or end time (for example, 5:00) instead of scrolling to find it.
Allow a few minutes for new appointments to publish, especially if they are far in advance. Only appointments within your advanced publishing preferences (for example, the next 28 days) can be booked by patients and store staff.
Choose an appointment length
Set the appointment length to the shortest length that divides evenly into all of the service's appointment types. This avoids scheduling conflicts.
- Example 1: vaccinations are all 10 minutes, so use 10 minutes.
- Example 2: beauty services are 15 and 30 minutes, so use 15 minutes.
- Example 3: health checks range from 5 to 30 minutes, so use 5 minutes.
You can also create all schedules in 5-minute blocks to fit every appointment length.
Patients see the 5-minute blocks online. The length set on the appointment type decides how many blocks are booked: a 15-minute appointment books three 5-minute blocks.
Edit or delete a schedule
- Go to the Repeat appointment schedules section and select the pencil icon on the schedule.
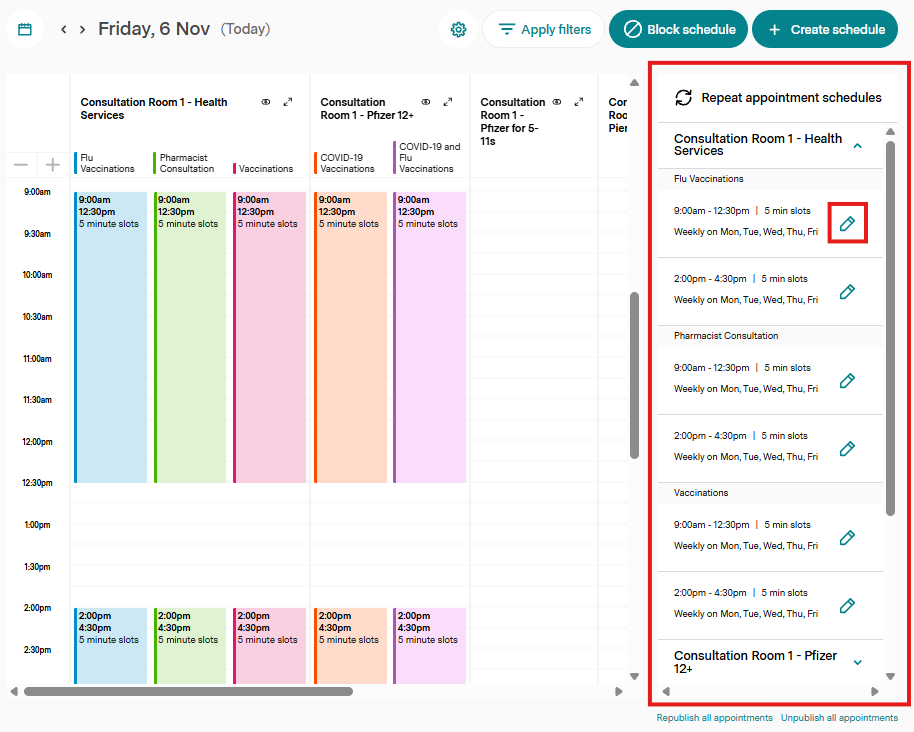
- Make your changes, then select Update appointments.
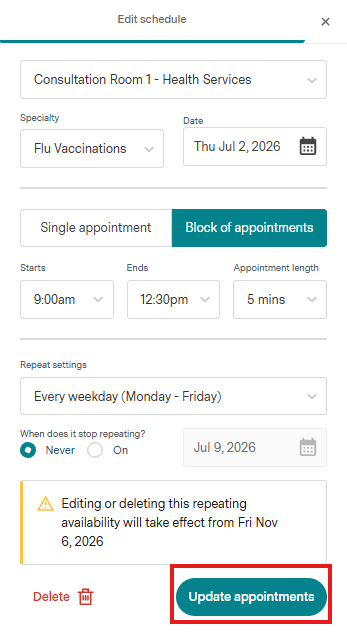
- To delete the schedule instead, select Delete.
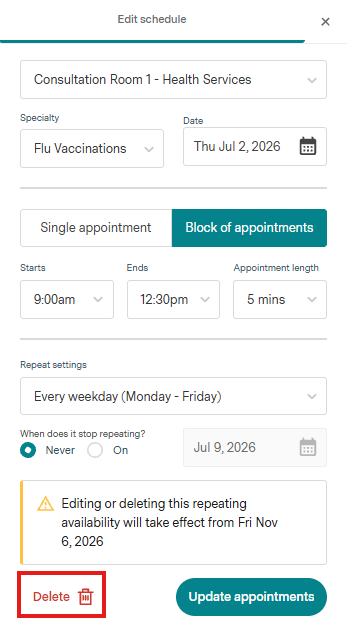
Editing a repeat schedule also updates all future appointments already published from it.
Add availability quickly (ad hoc)
Use this to extend your regular schedule or add extra appointments on a particular day.
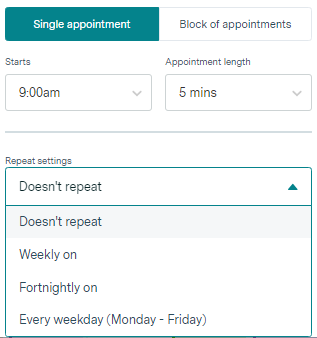
- Select the date and create a single appointment.
- Choose the start time and appointment length.
- You can repeat it weekly, fortnightly or every weekday, and set an end date.
Remove availability quickly (ad hoc)
Use this to change live appointments on a particular day without affecting your repeating schedules, for example when a staff member finishes early or takes a break.
- Select the schedule. A pop-up opens on the Manage availability tab, listing each slot in the schedule.
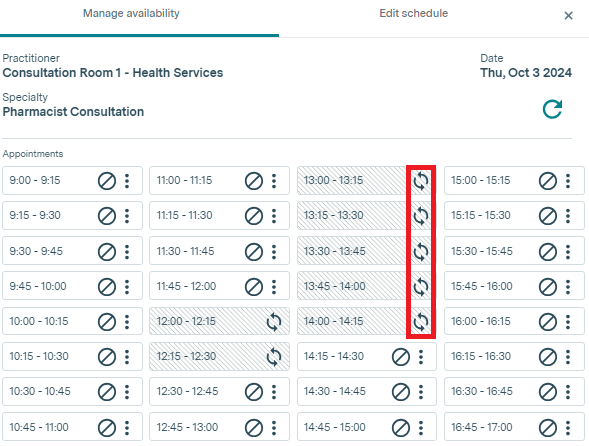
- Select the circle-with-a-line icon next to a slot to unpublish it.
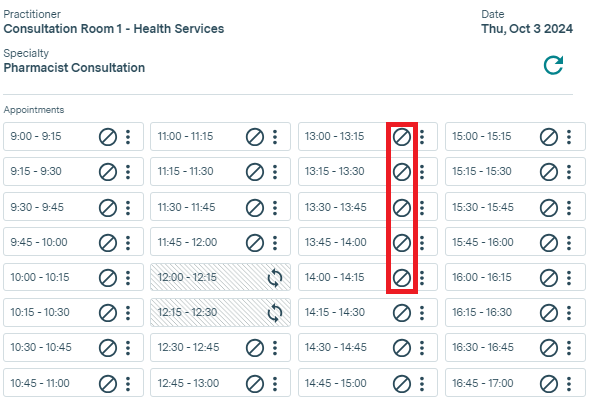
- The slot greys out. To undo, republish it from the same list.
To hide availability for public holidays or lunch breaks, see Creating, Editing and Deleting Block Schedules.
Edit or add Calendar rooms
To add consultation rooms, contact the Healthengine Enterprise Support Team by phone, live chat or corporate@healthengine.com.au.
Updates to appointment types and new specialties are only released to default rooms. Creating a custom room or editing a default room may stop it receiving these updates, so use the default rooms where possible.
Contact Our Support Team
If you need help with your Calendar, have your pharmacy name and the room and service you are working on ready, then contact our support team.