Although Healthengine gives patients the ability to manage their own appointments, practices can also manage this if a patient doesn't show up or needs to reschedule.
Where to View Patient Bookings
To view a patient's booking details, you can access this in either of two sections of your Practice Admin: the Calendar feature under 'Appointments setup' or the 'Bookings' tab.
Patient Bookings in Calendar
To view a patient's booking in 'Calendar', navigate to the date of the booked appointment in your Calendar and click on the schedule with the appointment in it.
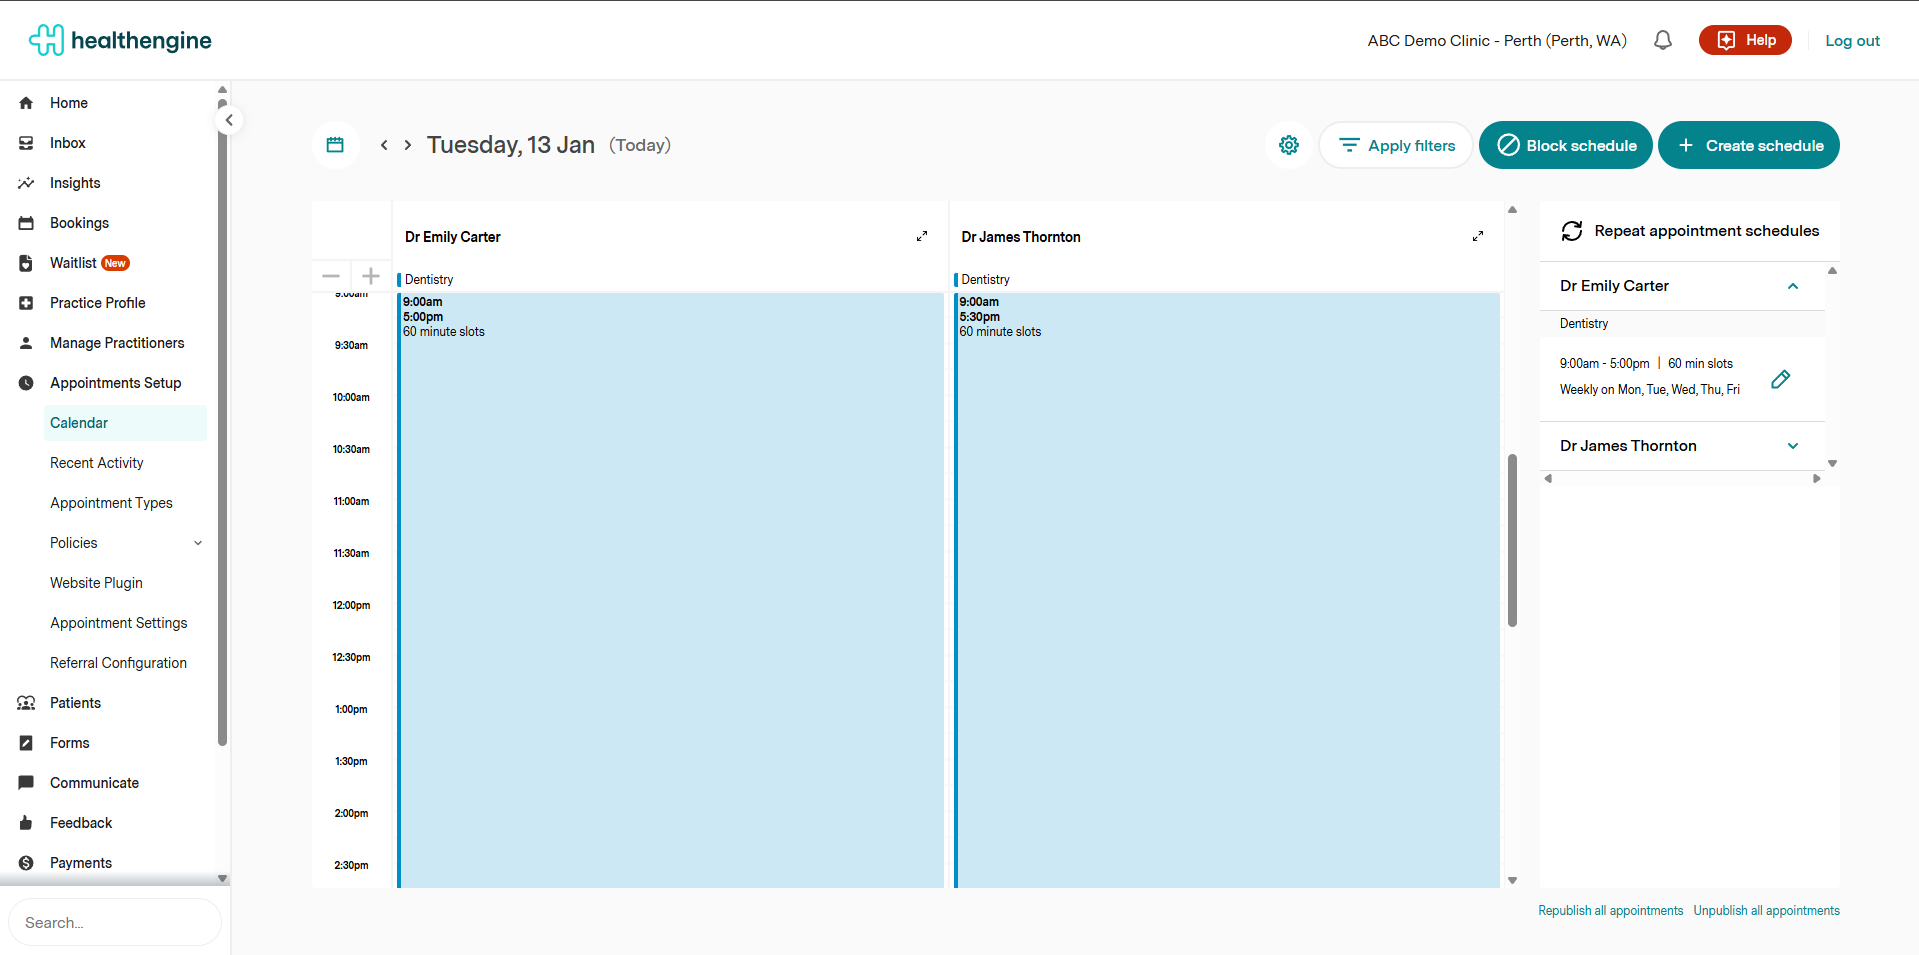
From here, a pop-up box will appear with a more detailed view of your appointment slots.
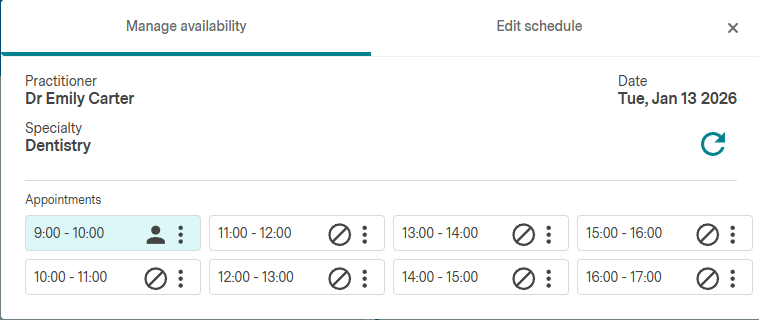
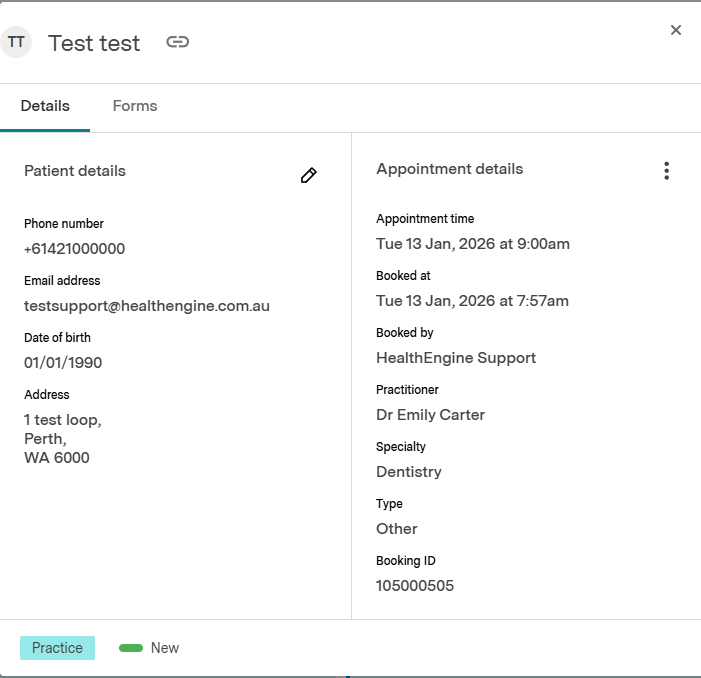
To view a patient's booking details, click on the person icon in line with that booking, as seen belo,w and a new pop-up will appear.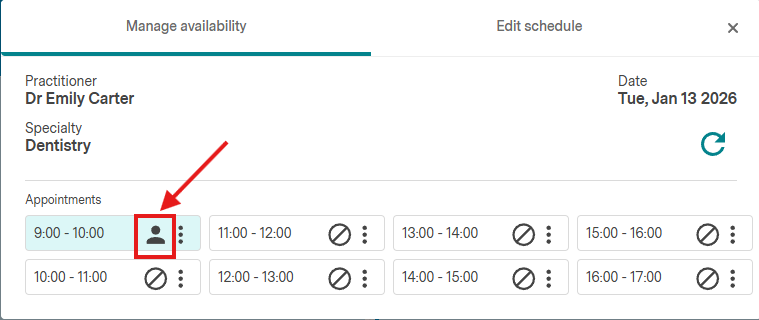
Patient Bookings in Bookings Feature
To view a patient's booking in 'Bookings', navigate to this section in your Practice Admin, then select 'Bookings'. Select the patient's name to see the same pop-up.

How to Reschedule a Booking
To reschedule a patient's booking in either "Calendar" or the "Bookings" feature, navigate to your preferred section and locate the patient's appointment slot.
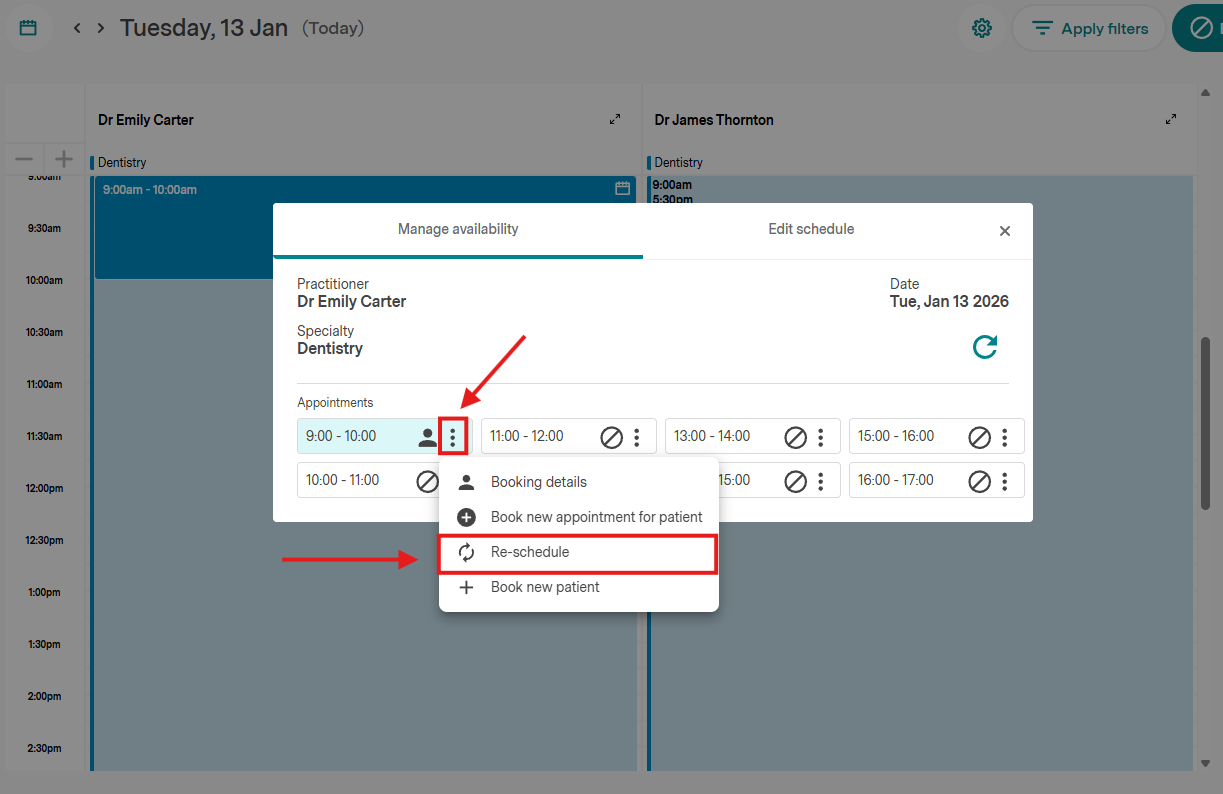
In "Calendar", there are 3 vertical dots beside a patient's appointment slot, as seen below - click this to open a list of options on how to manage this patient's bookings.
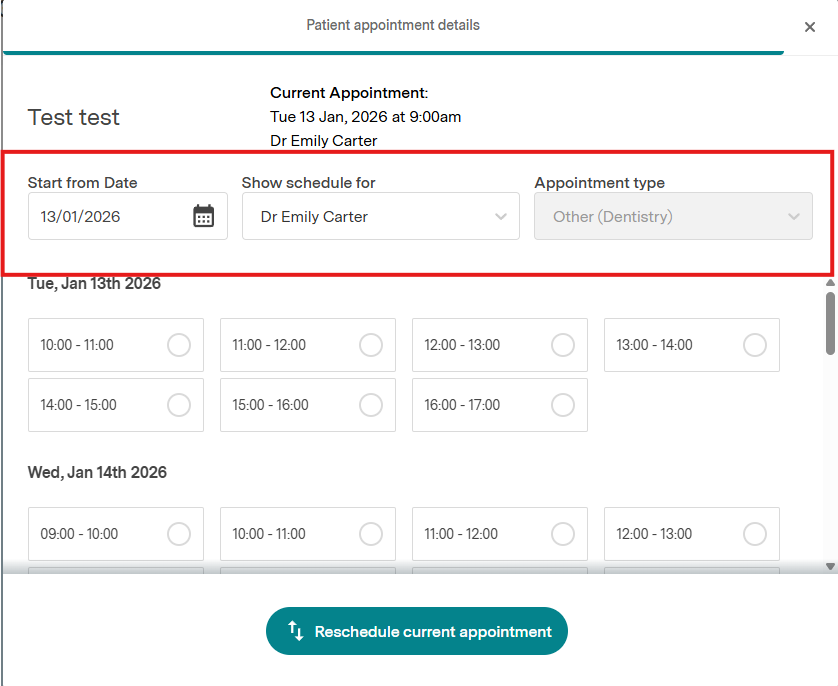
When you select "Reschedule Booking", a pop-up will appear with new options to reschedule. This defaults to the original booking date and details; however, you can reschedule to a new date or another practitioner. Only the appointment type can't be changed.
Once you have selected the new details of this patient's appointment, click the 'Reschedule current appointment' button to complete the reschedule.
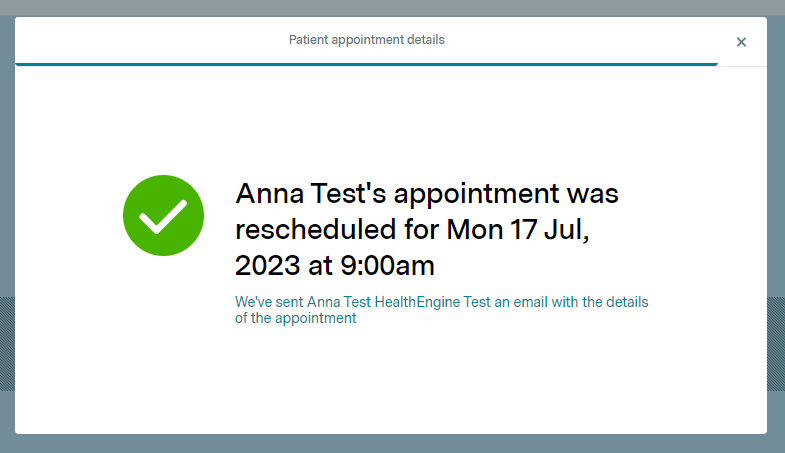
You will then see a confirmation message advising of the new booking details and that an email has been sent to the patient.
In the 'Bookings' section, open the patient's details and select the 3 vertical dots under 'Appointment details' - from here, select the 'Re-schedule' button as seen below:
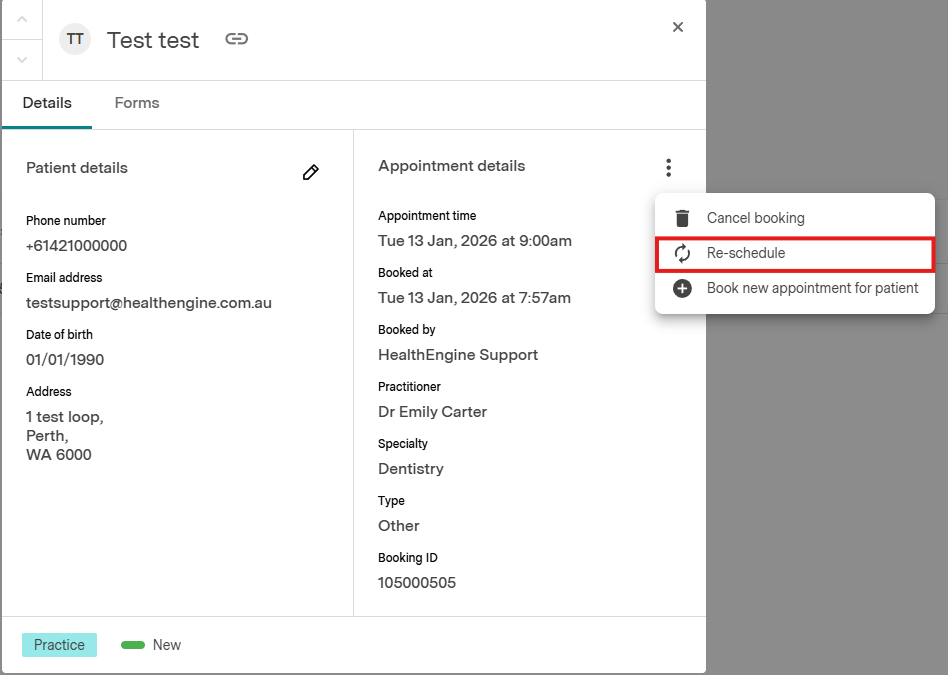
This will display the same rescheduling pop-up as seen in "Calendar" for you to fill out.
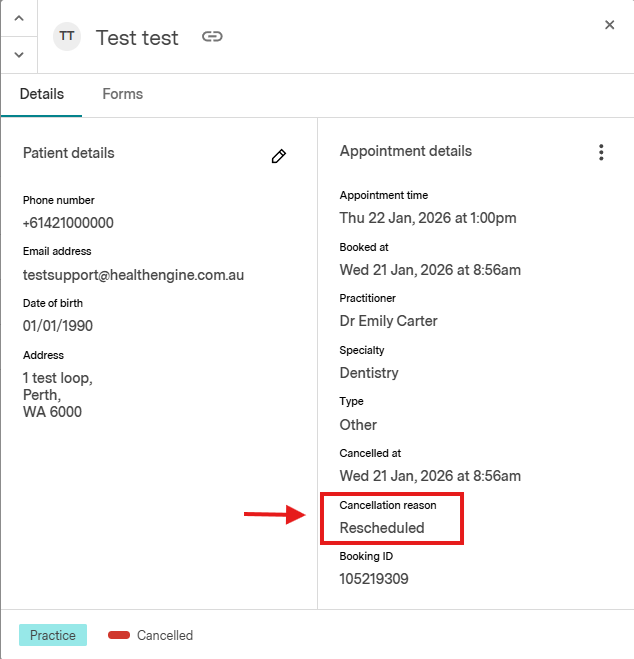
After, when you navigate back to the 'Bookings' feature, the patient's appointment will be rescheduled to the new time in the list.
Please note: The original appointment has been marked with a red cancelled flag and cancellation reason as rescheduled if you go into the expanded booking details.
How to Cancel a Booking
To cancel a patient's booking, select the 3 vertical dots in either 'Calendar' or 'Bookings' to open the list of options on how to manage this patient's bookings. From here, select 'Cancel Booking'

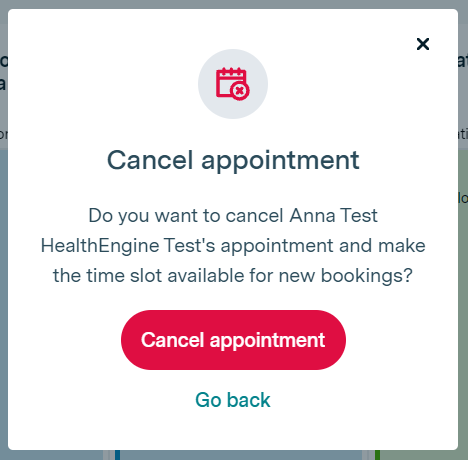
You'll be asked to confirm this cancellation, at which point, you simply need to select 'Cancel appointment' to confirm.
In the 'Bookings' section, the red cancelled flag will appear beside the patient's booking and in 'Calendar', you'll see that the appointment has been republished for another patient to book.
Please note: All patients are alerted to appointment cancellations via email at the time of the cancellation.
How to Book a New Appointment for an Existing Patient
Booking a new appointment for an existing patient is made easy with our rebook functionality; this allows stores to quickly book appointments without having to input patient details.
Rebooking via the Bookings Feature
This is the quickest way to rebook an appointment for an existing patient.
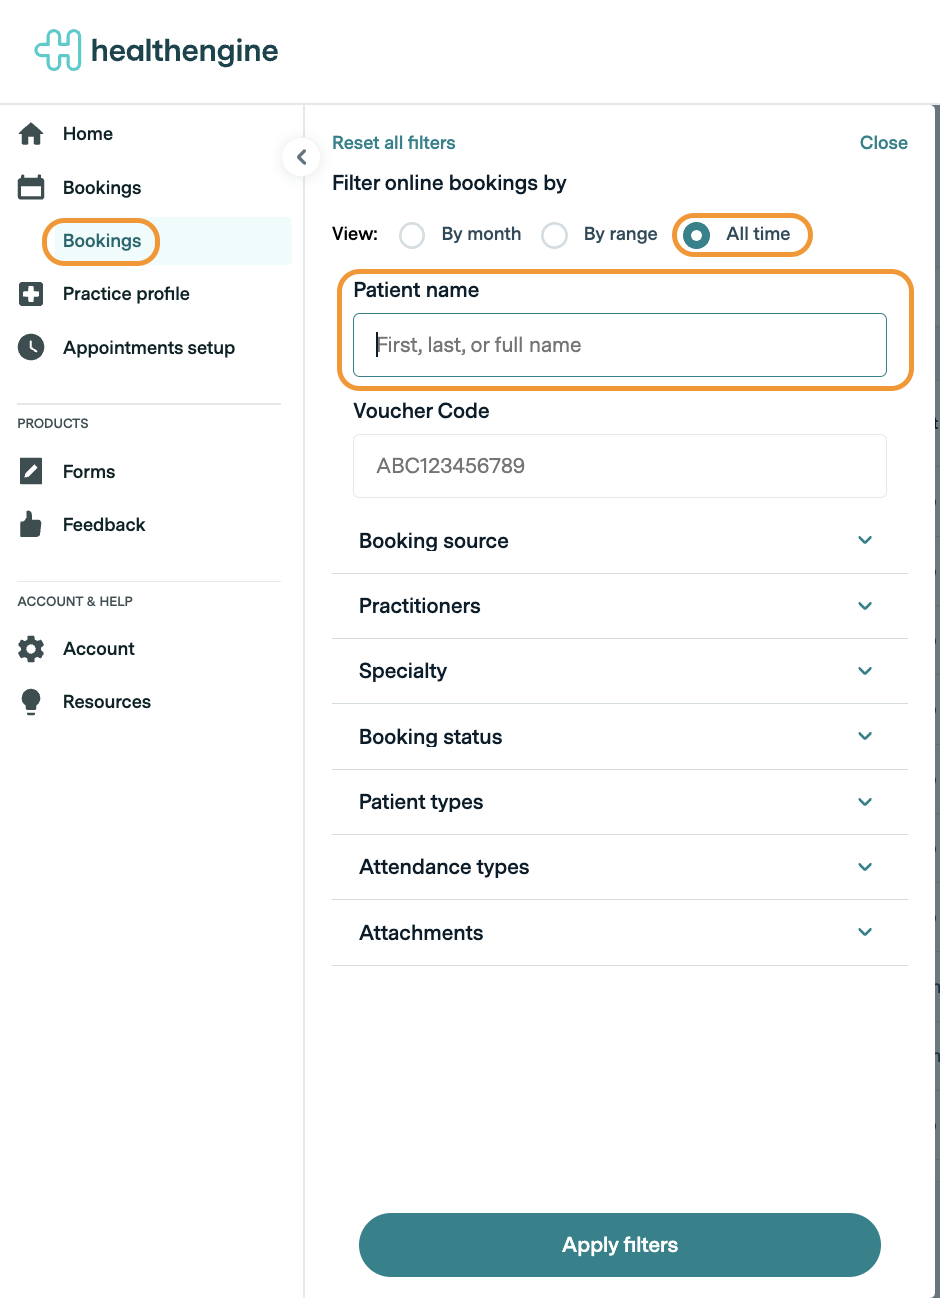
In the 'Bookings' feature, select 'Apply filters' and then select 'All time' before you do a patient name search. Click 'Apply filters' to complete the search.
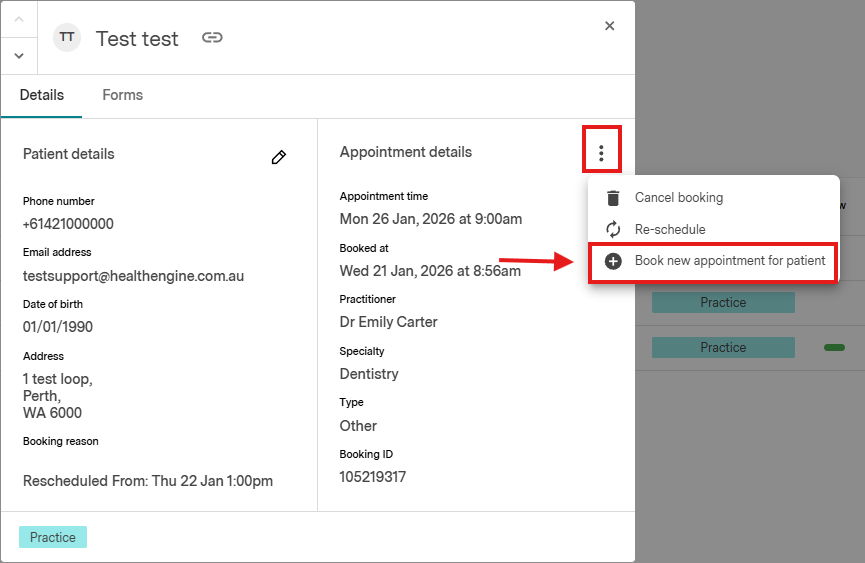
From there, find the correct patient booking, then click the 3 vertical dots and select 'Book new appointment for patient'.
If a patient has more than one booking, we recommend confirming which one has the correct contact details before booking.
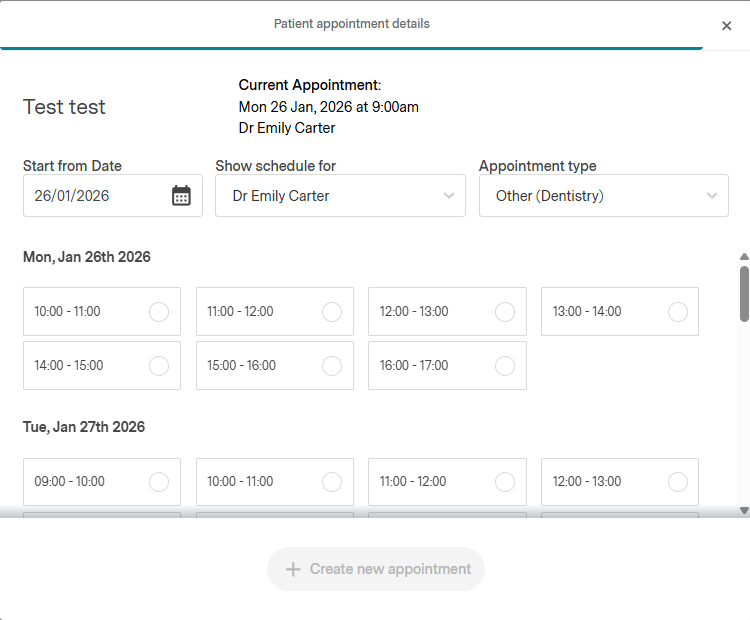
This will display the same rescheduling pop-up as seen in 'Calendar' for you to fill out. Once you have selected the details of the new appointment, click the 'Create new appointment' button to complete the booking.

A confirmation message will appear advising of the new booking details and that an email has been sent to the patient.
Rebooking via Calendar
This is the recommended way to rebook where the patient has just attended their appointment and wishes to book a follow-up or an appointment for a new service.
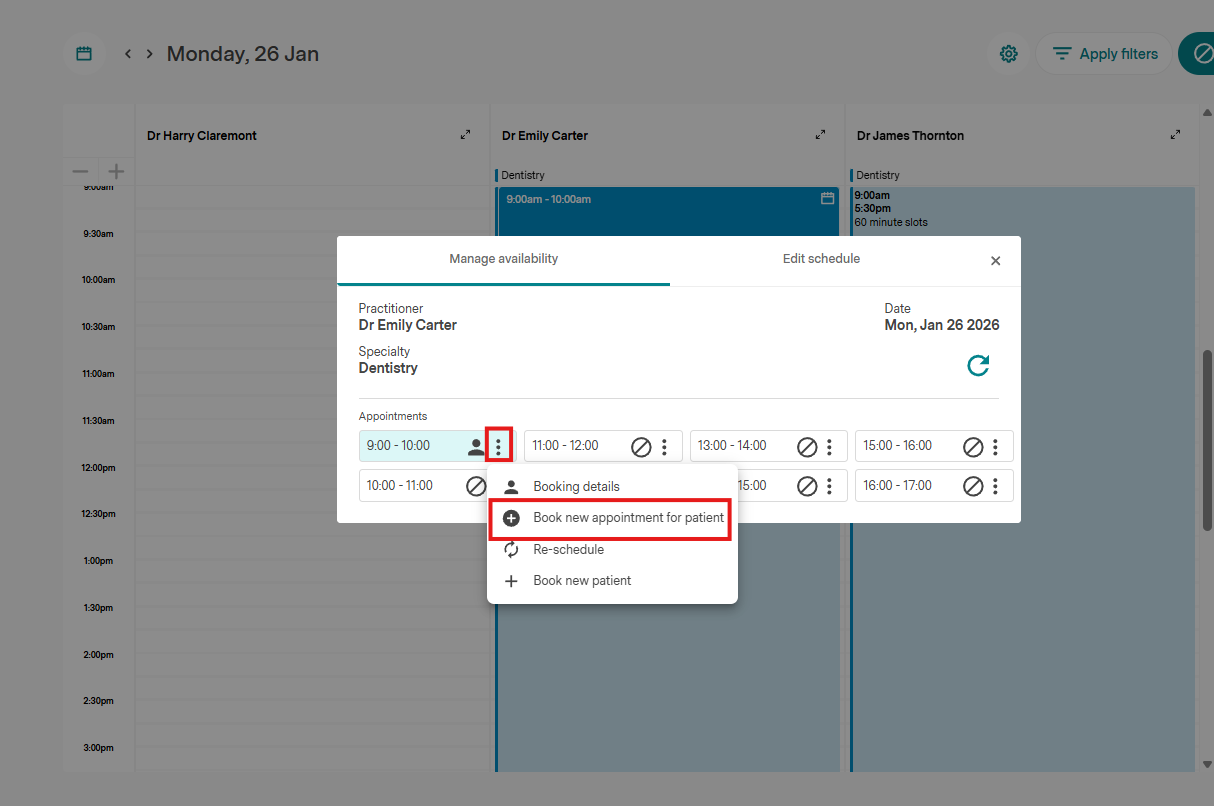
In 'Calendar' select the schedule with the patient appointment in it, then click the 3 vertical dots in the booked appointment slot. From here, select 'Book new appointment for patient'.
This will display the same rescheduling pop-up as seen in 'Calendar' for you to fill out. Once you have selected the details of the new appointment, click the 'Create new appointment' button to complete the booking.
A confirmation message will appear advising of the new booking details and that an email has been sent to the patient.